
Introduction to Set Screw Self-Tapping Screws
Are you fed up with standard screws that require a pilot hole and frequently fracture your materials? Now that set screw self-tapping screws are coming to save the day, you can put an end to those headaches! Installation is quick and simple with these unique screws since they are made to tap their own threads as they are placed into the material. We’ll take you through the installation of set screw self-tapping screws step-by-step in this tutorial, so you may take on any project without straining yourself. So gather your supplies and let’s begin our smooth road towards strong and reliable relationships!
Necessary Tools for Installation
Having the proper equipment is crucial for putting set screw self-tapping screws. Having the right tools on hand will guarantee a simple and easy installation procedure. The following are some essential tools you’ll need:
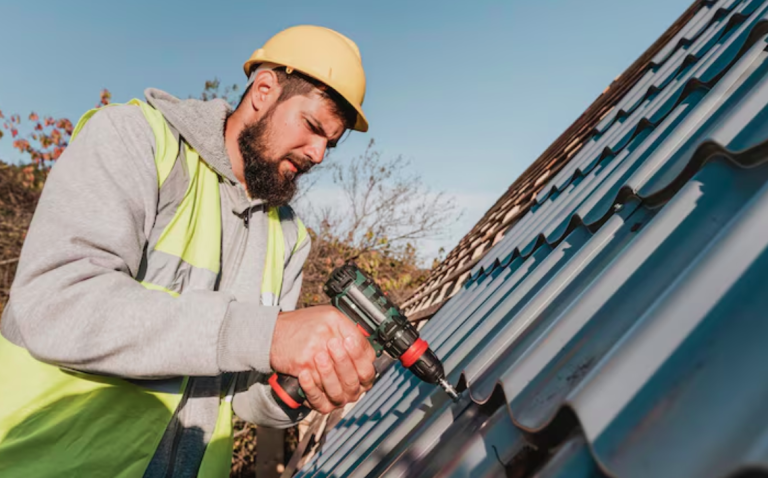
1. Reliable Power Drill: A power drill makes pilot hole drilling faster and easier. To accommodate varying materials, look for one with speed settings that can be adjusted.
2. Drill Bits: Depending on the needs of your project, select drill bits made especially for metal or wood. Using the proper size bit is essential to prevent surface damage and compromise the screw’s integrity.
3. Screwdriver: Although you can insert screws using a power drill, it’s always helpful to have one on hand in case you require greater accuracy or run into any problems when installing.
4. Measuring Tape and Marking instruments: Invest in a high-quality measuring tape and marking instruments, like as pencils or markers, as precise measurements are essential for marking drill points on your surface.
5. Safety Equipment: Remember to always be safe! When drilling, put on safety goggles to protect your eyes from debris and gloves to cover your hands from sharp edges.
Before beginning the installation procedure, make sure you have this essential equipment available. This will save you time and help you avoid any potential problems.
Step 1: Preparing the Surface and Marking Drill Points
Surface preparation is essential before you begin drilling holes for your set screw self-tapping screws. This will provide a smooth and secure penetration for the screws.
Verify that the surface is dust- and debris-free and clean. To get rid of any loose particles that might make installation more difficult, use a cloth or brush.
After that, measure the area and make a note for the drill spots. Here, accuracy is crucial, so make sure you put everything precisely by using a ruler or measuring tape. When choosing where drill points should be placed, it’s also critical to take load-bearing capability and weight distribution into account.
Before starting to drill, make sure your designated locations are aligned as intended. To make sure your drill points are absolutely straight, use a level.
When doing this step, don’t forget to use safety goggles since drilling can produce flying debris that could hurt your eyes.
You’ll be putting yourself in the best possible position to install set screw self-tapping screws if you take these preliminary actions carefully. It is therefore important to take your time during this initial step in order to achieve a safe and durable installation!
Step 2: Choosing the Right Drill Bit Size
Installing Set screw self-tapping screws requires the correct drill bit size. Insecure connections might come from stripped holes or loose screws from using the wrong size.
Consider numerous considerations to choose the right drill bit size. Check your self-tapping screw manufacturer’s specs. They generally suggest a drill bit size that matches their product.
Consider your material together with manufacturer guidelines. Different materials require different drill bit diameters for best results. Compared to softwood or plastic, hardwood or metal surfaces may require a bigger diameter drill bit.
Always start with a smaller pilot hole and get bigger if needed. This provides accuracy and avoids harm from starting with a big drill bit.
By considering these considerations and choosing the right drill bit size, you’ll install without problems!
Step 3: Drilling Pilot Holes
After preparing the surface and marking drill locations, drill pilot holes to insert set screw self-tapping screws. This step is critical for easy and secure screw installation.
Start with a drill bit that matches your screws’ diameter. A bigger or smaller bit might loosen or damage threads, so get this right. Insert the right drill bit into your power drill.
Place the drill bit tip directly over one of the specified spots and carefully drill into the material to attain the pilot hole depth. Keep a steady hand and manage drilling speed and angle.
Repeat this method for each designated spot, maintaining depth and placement. Take your time with this step!
After drilling all pilot holes, check them carefully. Clean them, remove debris, and line them with their marks.
The drilling pilot holes seem excessive, but it’s worth it! These tiny holes make self-tapping screws easy to install without damaging materials.
Step 4: Inserting the Screws and Tightening with a Screwdriver
After drilling your pilot holes, it’s time to put the screws in and use a screwdriver to tighten them. Take your time, since this stage demands dexterity and a steady hand.
First, make sure the screw and pilot hole are lined up. Before inserting it, make sure it is exactly perpendicular to the surface. A little angle may lead to the screw binding or stripping, which might result in further problems.
As you move the screw clockwise into the hole, gently apply pressure. To ensure more precision and control, use a manual screwdriver. Power tools should not be used at this point since they might damage the screws or over tighten them.
Once you encounter resistance, the screw has gotten to the appropriate depth. Continue spinning. Avoid over tightening since this may lead to splits or cracks in brittle materials such as plastic or wood.
Make sure there are no spaces between the screw head and the material when working with metal surfaces. This will guarantee a tight fit and stop any gradual loosening.
Check the tightness of each screw once it has been placed by going over it again. If necessary, gently twist each one with your screwdriver, taking care not to twist it too far.
Best wishes! In just four easy steps, you’ve successfully installed set-screw self-tapping screws! These adaptable fasteners will offer long-lasting strength and stability for a variety of uses around your house or place of business when installed correctly.
Common Mistakes to Avoid
Common Mistakes to Avoid
Even while Self Tapping Screws look simple to install, there are a few typical blunders that can cause aggravation and less-than-satisfactory outcomes. To guarantee a successful installation procedure and to avoid needless headaches, it is important to be aware of these potential dangers. Here are some critical errors to steer clear of:
Ignoring surface preparation: Ignoring to properly prepare the surface before drilling is one of the most frequent errors. Make sure you completely clean the area and get rid of any debris or obstructions that can make the installation difficult.
2. Inaccurately designating the drill points: Precise screw placement depends on accurate drill point marking. Make sure the dots line up with your intended result by taking your time while measuring and marking them.
3. Using the incorrect size drill bit: It is essential to use the appropriate drill bit size to create pilot holes that suitably receive the set screw self-tapping screws. Choosing the wrong size may cause materials to break or fittings to become loose.
4. Ignoring pilot hole drilling: When screwing into tougher materials, such as metal or hardwoods, it’s crucial to follow this step to avoid the screws splitting or breaking.
5. Overdriving or under driving screws: Finding a balance between overdriving and under driving is essential when tightening set screw self-tapping screws. Under driving might lead to weak connections that undermine stability, while overdriving could destroy materials.
You may save time and effort during the installation process and get the best results from your set screw self-tapping screws by avoiding these typical blunders.
Never forget that practice makes perfect! Don’t be too harsh on yourself if things don’t go as planned the first time around if you’re new to utilizing these kinds of fasteners. You’ll grow more skilled at correctly installing them every time with time and practice!
Here is a comprehensive instruction explaining how to install set screw self-tapping screws without any difficulties.